
Terraforming an AWS VPC Part 4 - using modules
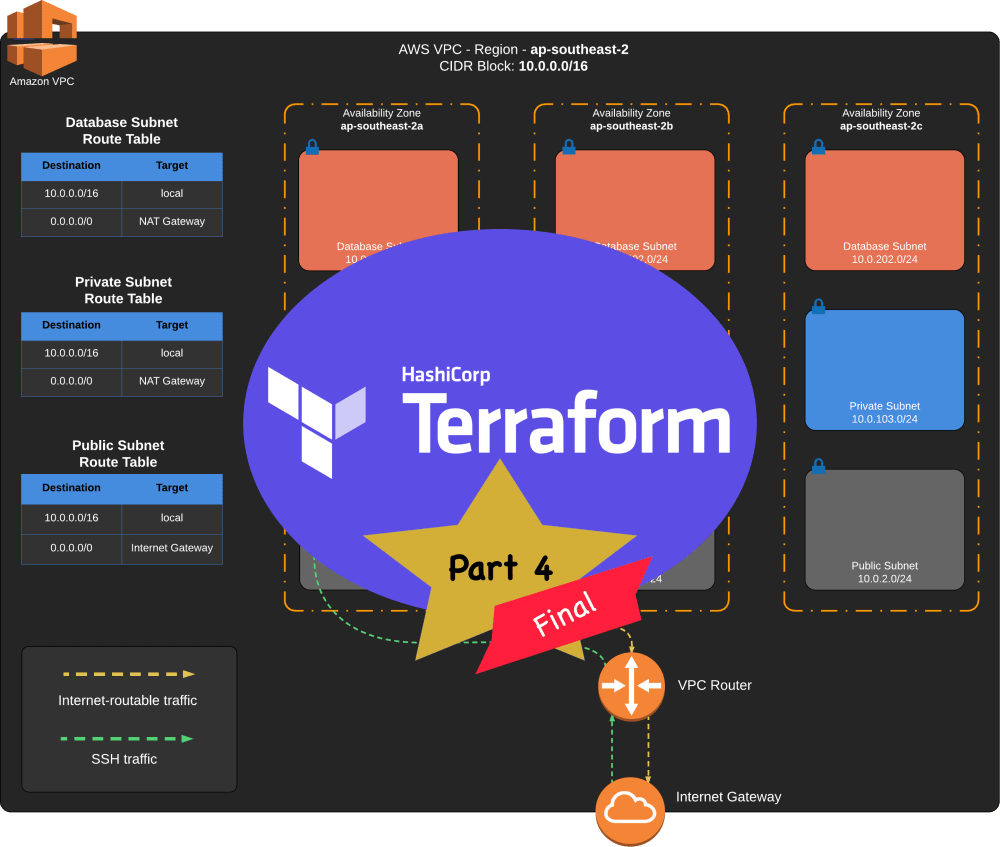
Table of Contents
This is the fourth and final part of a series of articles on how to set up an AWS VPC using Terraform version 0.12.29.
Up until now we are setting up our VPC using Terraform the hard way. There is a better and easier way to provision the AWS resources using the third-party Terraform AWS VPC module.
In this post, we will create a new Terraform project with significantly fewer codes. It should run as a standalone project, with no dependency on the steps we did from Parts 1, 2, and 3.
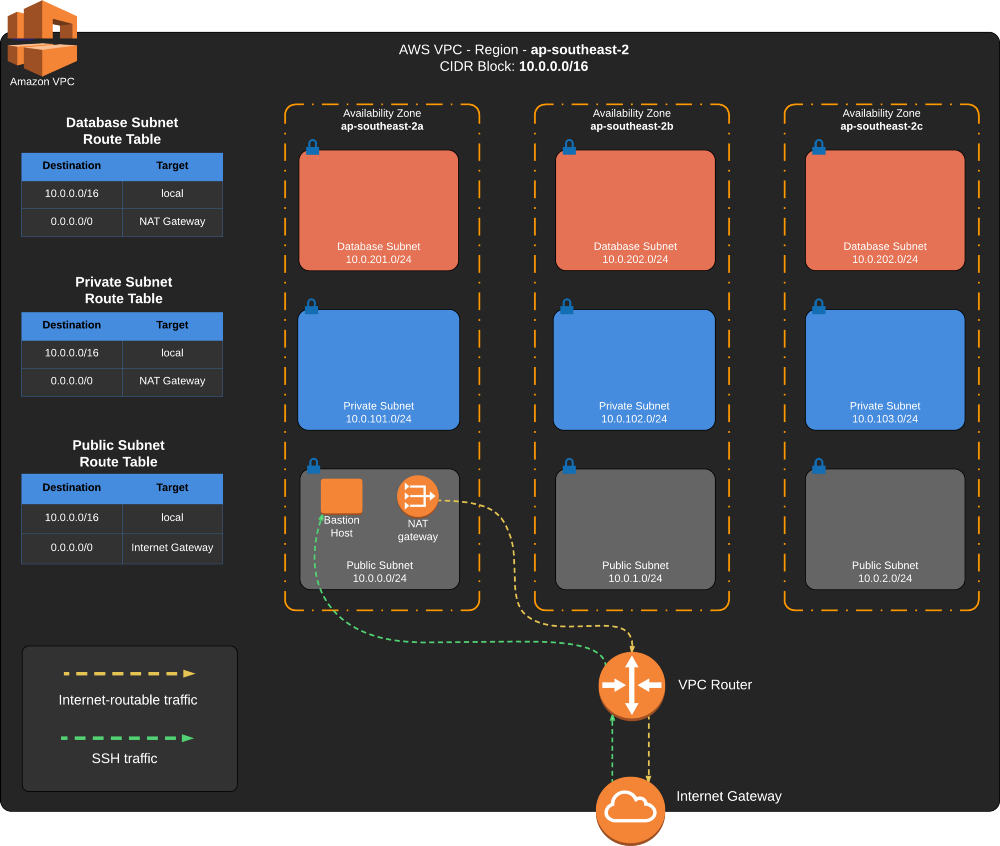
VPC Diagram
- AWS VPC
- Internet Gateway
- 3x Public subnet — one for each AZ
- 3x Private subnet — one for each AZ
- 3x Database subnet — one for each AZ
- Public subnet route table
- Private subnet route table
- Database subnet route table
- EC2 Bastion Host
- Elastic IP Address
- NAT Gateway
The diagram below is to help you visualize what we will create.
Set up a Terraform Project with AWS Provider
The AWS on-demand resources we will be provisioning in this section will incur cost. Make sure you terminate all resources
when you are done. You can do it manually or by running terraform destroy
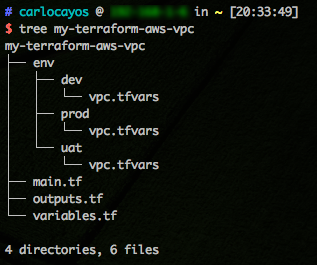
Create a new project folder with files main.tf, outputs.tf, variables.tf. Then create a
directory env/dev, env/uat, env/prod, each will have vpc.tfvars file.
Open the file main.tf and add the AWS Provider.
#-------------------------------
# AWS Provider
#-------------------------------
provider "aws" {
  region = var.aws_region
}
Initialize Terraform by running this command. It should set up the project and download the defined AWS Provider.
$ terraform initCreate a DEV workspace, similar to what we did in Part 2.
$ terraform workspace new dev
$ terraform workspace list
VPC Environment-Specific Variables
Open variables.tf and add these variable declarations.
variable "aws_region" {
  description = "AWS Region"
}
variable "vpc_cidr_block" {
  description = "Main VPC CIDR Block"
}

variable "availability_zones" {
  type = list(string)
}

variable "public_subnet" {
  type = list(string)
}

variable "private_subnet" {
  type = list(string)
}

variable "database_subnet" {
  type = list(string)
}
Open env/dev/vpc.tfvars and set the environment-specific values for the DEV workspace.
In here we set the AWS region to Sydney and the VPC configurations.
aws_region         = "ap-southeast-2"
vpc_cidr_block     = "10.0.0.0/16"
availability_zones = ["ap-southeast-2a", "ap-southeast-2b", "ap-southeast-2c"]
public_subnet      = ["10.0.0.0/24", "10.0.1.0/24", "10.0.2.0/24"]
private_subnet     = ["10.0.101.0/24", "10.0.102.0/24", "10.0.103.0/24"]
database_subnet    = ["10.0.201.0/24", "10.0.202.0/24", "10.0.203.0/24"]
Adding the Terraform AWS VPC Module
Now it’s time to demonstrate how to use the AWS VPC Module with our DEV VPC configuration.
Open main.tf file and add the Terraform AWS VPC Module.
#-------------------------------
# AWS VPC
#-------------------------------
module "vpc" {
  source  = "terraform-aws-modules/vpc/aws"
  version = "2.44.0"

  name = "my-vpc-terraform-module-${terraform.workspace}"
  cidr = var.vpc_cidr_block

  azs              = var.availability_zones
  public_subnets   = var.public_subnet
  private_subnets  = var.private_subnet
  database_subnets = var.database_subnet

  create_igw         = true
  enable_nat_gateway = true
  single_nat_gateway = true

  tags = {
    Terraform   = "true"
    Environment = terraform.workspace
  }
}
Run terraform init to download the module.
Inspect the codes we have added. In just around 20 lines we have defined the VPC configuration similar to what we did in Parts 1-3. But this time we let the module handle all the boilerplate codes!
We only used the VPC module inputs we needed for this example. An exhaustive list of the inputs can be found in Terraform AWS VPC Module Input
A quick run through in our VPC Module configuration.
azs- this is the list of availability zones. We set it to Sydney region AZs.public_subnets- public subnet, set this with CIDR block listprivate_subnets- private subnet, set this with CIDR block listdatabase_subnets- database subnet, set this with CIDR block listcreate_igw- flag to indicate creation of an Internet Gateway, default is trueenable_nat_gateway- set to true to provision a NAT Gatewaysingle_nat_gateway- set to true to provision a single shared NAT Gateway, otherwise it will create a NAT gateway in each public subnettags- a map of tags to add to ALL taggable resources created through this module
And that’s it! All of these in just 20 lines of codes. Let’s now provision these resources, run these commands.
$ terraform workspace select dev
$ terraform apply -var-file=env/dev/vpc.tfvars
In the logs, you should see that Terraform will create the VPC with 27 AWS resources.
+ resource "aws_db_subnet_group" "database"...
+ resource "aws_eip" "nat"...
+ resource "aws_internet_gateway" "this"...
+ resource "aws_nat_gateway" "this"...
+ resource "aws_route" "private_nat_gateway"...
+ resource "aws_route" "public_internet_gateway"...
+ resource "aws_route_table" "private"...
+ resource "aws_route_table" "public"...
+ resource "aws_route_table_association" "database"...
+ resource "aws_route_table_association" "database"...
+ resource "aws_route_table_association" "database"...
+ resource "aws_route_table_association" "private"...
+ resource "aws_route_table_association" "private"...
+ resource "aws_route_table_association" "private"...
+ resource "aws_route_table_association" "public"...
+ resource "aws_route_table_association" "public"...
+ resource "aws_route_table_association" "public"...
+ resource "aws_subnet" "database"...
+ resource "aws_subnet" "database"...
+ resource "aws_subnet" "database"...
+ resource "aws_subnet" "private"...
+ resource "aws_subnet" "private"...
+ resource "aws_subnet" "private"...
+ resource "aws_subnet" "public"...
+ resource "aws_subnet" "public"...
+ resource "aws_subnet" "public"...
+ resource "aws_vpc" "this"...

Apply complete! Resources: 27 added, 0 changed, 0 destroyed.
Terraform Output
The module also provides information of the created resources through the Terraform AWS VPC Module Output.
To demonstrate how to use it, create the file outputs.tf and add these codes.
output "vpc_id" {
  value = module.vpc.vpc_id
}

output "vpc_cidr_block" {
  value = module.vpc.vpc_cidr_block
}

output "azs" {
  value = module.vpc.azs
}

output "private_subnets_cidr_blocks" {
  value = module.vpc.private_subnets_cidr_blocks
}

output "public_subnets_cidr_blocks" {
  value = module.vpc.public_subnets_cidr_blocks
}

output "database_subnets_cidr_blocks" {
  value = module.vpc.database_subnets_cidr_blocks
}
Apply the output changes.
$ terraform apply -var-file=env/dev/vpc.tfvars
$ terraform output
You should see details of your cloud infrastructure as what you have defined in the outputs.tf file.
azs = [
  "ap-southeast-2a",
  "ap-southeast-2b",
  "ap-southeast-2c",
]
...
vpc_cidr_block = 10.0.0.0/16
vpc_id = vpc-0918ff5d446d5a6b4
Helper Script
Up until now we are running the commands like so:
$ terraform workspace select dev
$ terraform apply -var-file=env/dev/vpc.tfvars
This 2-step process is prone to error as you might run the command terraform apply with the variable for dev
environment in an incorrect workspace (i.e. uat or prod).
I made a simple helper script to avoid this type of human error. Create a new file terraform_helper.sh and copy
this script.
#!/usr/bin/env bash

#-----------------------------------
# Check valid subcommand
#-----------------------------------
subcommand_arr=("plan" "refresh" "apply" "destroy")

valid_subcommand=0

for c in "${subcommand_arr[@]}"
do
    if [[ "${c}" == "$1" ]]
    then
        valid_subcommand=1
        break
    fi
done

# Check if subcommand is valid
if [[ ${valid_subcommand} -eq 0 ]]
    then
        echo "Invalid subcommand.\n Usage: './terraform_helper.sh <subcommand> <workspace>'"
        exit 1
fi

#-----------------------------------
# Check valid workspace
#-----------------------------------
workspace_arr=(`ls -1 env`)

valid_workspace=0

for workspace in "${workspace_arr[@]}"
do
    if [[ "${workspace}" == "$2" ]]
    then
        valid_workspace=1
        break
    fi
done

# Check if workspace is valid
if [[ ${valid_workspace} -eq 0 ]]
    then
        echo "Invalid argument.\n Usage: './terraform_helper.sh <subcommand> <workspace>'"
        exit 1
fi

# Set the workspace
workspace_command="terraform workspace select $2"
echo "Selecting workspace... ${workspace_command}\n"

eval ${workspace_command}
if [ $? -ne 0 ]; then
    exit 1
fi

# Run the command
terraform_command="terraform $1 -var-file=env/$2/vpc.tfvars"
echo "Running command... ${terraform_command}\n"

eval ${terraform_command}
if [ $? -ne 0 ]; then
    exit 1
fi
The script accepts two arguments; a <subcommand> (“plan” “refresh” “apply” “destroy”),
and the target <workspace>. It would change to the target workspace and set the environment-specific values to the
variables. One caveat is that the workspace name (e.g. dev) should match the directory where you store the variables
(e.g. env/dev/vpc.tfvars).
$ ./terraform_helper.sh apply devSpinning up AWS EC2 instances
The information from the Terraform AWS VPC Module Output we discussed in the previous section can also be used to create other resources. In this section, we will create an EC2 instance bastion host using the information from the module output.
Create a key pair to connect to the EC2 instance. Create it manually by following the steps
in the AWS documentation.
Use the Sydney region for our DEV workspace. Take note of the key pair name.
Create a new file server.tf and add the script below. Replace the key_name = "my-keypair" value with your key pair name.
data "aws_ami" "ubuntu" {
  most_recent = true

  filter {
    name   = "name"
    values = ["ubuntu/images/hvm-ssd/ubuntu-bionic-18.04-amd64-server-*"]
  }

  filter {
    name   = "virtualization-type"
    values = ["hvm"]
  }

  owners = ["099720109477"] # Canonical
}

resource "aws_security_group" "bastion_host_sg" {
  name   = "bastion_host_sg"
  vpc_id = module.vpc.vpc_id

  ingress {
    from_port = 22
    to_port   = 22
    protocol  = "tcp"

    // Not the safest thing to do, but you can replace this with your public IP
    cidr_blocks = ["0.0.0.0/0"]
  }

  egress {
    from_port   = 0
    to_port     = 0
    protocol    = "-1"
    cidr_blocks = ["0.0.0.0/0"]
  }

  tags = {
    Name = "my-bastion-host-security-group-p4"
  }
}

resource "aws_instance" "bastion_host" {
  ami                         = data.aws_ami.ubuntu.id
  instance_type               = "t3.micro"
  subnet_id                   = module.vpc.public_subnets[0]
  associate_public_ip_address = true
  key_name                    = "my-keypair" // change this
  vpc_security_group_ids      = [aws_security_group.bastion_host_sg.id]
  tags = {
    Name = "My Bastion Host - Part 4"
  }
}
Inspect the codes, you will notice that there are two lines where we use the module output to set the resource meta-argument.
1) In the aws_security_group resource
vpc_id = module.vpc.vpc_id

2) In the aws_instance resource
subnet_id = module.vpc.public_subnets[0]
Run terraform apply to create the EC2 instance.
$ terraform apply -var-file=env/dev/vpc.tfvarsOr if you are using the helper script.
$ ./terraform_helper.sh apply devRemoving Terraform-managed resources
DO NOT SKIP THIS STEP! Terminate all created resources to stop your account from incurring charges.
Destroy all created resources in the DEV workspace.
$ terraform workspace select dev
$ terraform destroy -var-file=env/dev/vpc.tfvars
Or if you are using the helper script.
$ ./terraform_helper.sh destroy devIf you used the other workspaces, then make sure you destroy it all too.
# UAT
$ terraform workspace select uat
$ terraform destroy -var-file=env/uat/vpc.tfvars

# PROD
$ terraform workspace select prod
$ terraform destroy -var-file=env/prod/vpc.tfvars
Review
This ends the tutorial series on Terraform and how to use it to create a shared and configurable infrastructure as code project.
By now you should be familiar with Terraform, its syntax, the available providers, and its resources. We started doing it the hard way to cover the basics of Terraform. Then we used a third-party AWS VPC module to demonstrate how it can significantly reduce the lines of codes in our project.
Next step is for you to explore the other Terraform providers and create your own module. It might be a combination of other modules or something you created by yourself.
Hope that you find my Terraform tutorial series informative.
Project Codes
Download the complete codes in https://github.com/carlocayos/terraform-vpc-module-tutorial.
